Saturday, July 25, 2009

New Electricity!

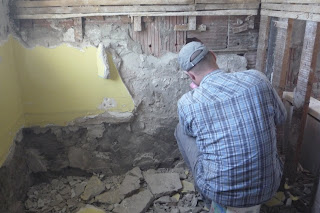
Another highlight of completely ripping the house apart was replacing the old "knob & tube" electricity that still existed in the house. When we redid the third floor we changed the wiring, and when the kitchen was done it too had new wiring installed. That left the basement (to a certain extent) and the main and second floor. Living with "old" wiring is not cool at all - for example the amount of "3 pronged plugs" in the house was at best minimal. For the last 3 1/2 years Markus ran a nice orange extension plug from the computer room to the hallway, in order to plug in his computer and other devices. The amount of power bars in the house was ridiculous, and the constant fear in the back of your head about the knob and tube suddenly deciding to short was not cool. So, new wiring in the remainder of the house was basically a must in this renovation and was the absolute best time to do it since the walls were completely exposed.


The best thing about new wiring is that we were able to add lights to places like the closets, and rearrange the lighting in rooms to fit our needs better. We have added many two-way and three-way switches which will be great!


Dad found a great electrician by the name of Tim Palmer, and he basically wired the whole house in 2 1/2 days. It was amazing how he and his co-worker threaded the wiring all around the house and had everything ready to go in no time. Although Tim's sarcasm was a bit much to handle the last day he was there as Markus asked him when he would return to hook everything to the box and he replied "6 months...you should probably be done drywalling by then"...

Monday, July 20, 2009

A Building We Will Go

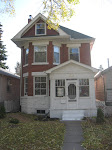
After the demolition was done the next step to this project was to build new frames for all of the outside walls. This was due to the fact that the lath was attached to the outside brick wall by tiny little nails in a tiny strip of wood placed between the brick. Once everything had come down, there was nothing there for us to hang drywall on.

The first decision we had to make was how we were actually going to build these walls. We debated two options:
1. build 2x4 walls and in the end have deeper window wells and adjust accordingly after
2. rip the 2x4's and build the walls to fit the existing windows

we went with option number one as it seemed the most logical to us. We figured that it would be less work in the end to adjust the depth of the windows, than it would be to try and make walls fit to the windows.

And so it began....and now July 20th...we are almost done. We have been working on building walls for about 4 weeks straight now and have finally just about finished all the framing we need to do. For the most part we have not encountered too many problems as we have been framing. The majority of the walls are built with 2x4's, and in some sections because of space we have had to make 2-3 separate frames to do a wall. The most difficult area we anticipated was the west outside wall that runs from the front of the house to the basement, and under the stairs. Once we had ripped everything down, the space under the stairs varied but for the most part we only had 2 inches to work with. This posed a problem as we had been building all other walls using a 3 1/2 spacing. The other issue with this wall was that it was so big. Because it runs the length of the house and all the way up the stairs, we needed to build at least 2 large and separate frames to cover the wall at its largest point. After much deliberation we decided to try and build the wall on the flat and tie into the stairs where we could to stabilize the frame. To our surprise this worked very well and went incredibly fast compared to many other walls we built. The following is a selection of pictures that shows the various frames we have built around the house. The last few pictures I will post will be of the wall built on the flat!

Friday, July 17, 2009

How Can Something so Small be so Crappy?

One of the worst rooms to take apart ended up being our small bathroom. This is one of the rooms we had left to last, and one weekend Markus and I tackled it. This room was mostly covered with the industrial diamond shaped wire I described before, and plaster. The upper part of the wall all away around the room and the ceiling were done in this manner, which meant that we had to rip and struggled with the crap for quite awhile. After we had removed the majority of this wire, we realized the bottom portion of the walls had been covered with plaster and cement directly. We attempted to chip this off entirely until we realized that the plaster/cement would not come off easily and in most cases would take the brick behind with it. This is when Markus decided that we could only chip off the first layer (approximately 2 inches) and would have to leave the rest on the wall. Markus being the good guy he is, sat for a few hours and chipped away at this crap with a chisel and hammer.

The next surprise we found in this little bathroom was when we went to remove the tile on the floor. Again we realized that chipping away the tile by itself was a ridiculous idea as it came out piece by piece. After we put a sledge hammer to a part of the floor and investigated further, we found that somebody had poured at least 4 inches on concrete to make the bathroom floor before putting tile on. Our only assumption was that someone was attempting to make a bomb shelter, or assumed that there would be a lot of water spilling on the floor, because otherwise there really is no rational explanation. Again, Markus took on the job of chipping out the 4 inches of concrete over a series of days, and finally the bathroom was clear.

Eliminating the Boiler

One of the decisions we made early on was that we would eliminate our boiler and the radiators and change over to a furnace. The decision to do this was due to the cost of purchasing a new boiler system and the possible work that would have to be done to ensure the old pipes could withhold the pressure from a new boiler system. We were afraid that if we put in a new boiler, the pressure from the system would put stress on the old pipes and somewhere down the line we would have a very large leak. In terms of cost efficiency, a new boiler would be upwards of $20,000 and to recoup the costs would mean we would have to be in this house a very, very long time. So instead we decided that our best option was to put in a furnace and duct work as we would have all the necessary walls open to do this.

After making a few phone calls we decided to go with Douglas Plumbing and Heating. We met with the owner Neil Douglas, and liked him right away. He was honest, helpful and knew his stuff. Thus the move to forced air began.

Before Neil and his crew could come in and begin work, Markus and I had to remove the majority of the pipe that was running through the walls to the radiators, and remove the pipe in the basement that was connected to the boiler. We removed pipe from the house by cutting through it with a reciprocating saw. We fortunately found a deal at Canadian Tire for a Mastercraft reciprocating saw for $39.99. In addition to this great price, we were also fortunate enough to have teenagers working the return desk when we returned our "broken" saws multiple times, as the may have bent once or twice as we cut through the pipes.

The biggest job came when we had to remove the actual radiators from the house. We debated for quite some time as to what would work best, as the radiators on average (minus water) weighed in at over 200 pounds. I advertised them on Used Regina and Kijiji, but nobody wanted to take them off of our hands, so we were left with the task of removing them ourselves. Markus did some research on the net and found that really the best solution was to smash them to pieces. On our second "work weekend" with friends, Markus my dad and our friend Blair smashed the radiators into pieces with a sledge hammer and hauled them to the bin. The smashing of the radiators actually went faster than we thought, but dad had a few minor cuts and abrasions afterwards from the pieces of radiator that flew up at him as he smashed away.

Thursday, July 16, 2009

Death By Plaster

Unfortunately the next step in this renovation was to take off ALL of the existing plaster and wooden lath from the first and second floor. By the time we started swinging our crowbars, the plaster had seen better days and did not put up much of a fight coming off.

The first room we tested was our small knick-knack room upstairs - as we wanted to see what was behind the walls and how easy it would be to take off. The second room came down almost by accident as Markus, my dad Peter, our friend Don and I were finishing taking down the trim in the house one weekend. Being a bit bored, as we worked in the living room, I started to bang at the wall and the plaster started falling. We all looked at each other and shrug our shoulders and pretty soon there was a gigantic pile of plaster in the middle of the room. The reaming rooms we cleared of plaster on two different "work weekends". The wooden lath cam down over a series of weeks, with Markus and I working after school and on the weekends.

Taking down the plaster and wooden lath has to be one of the dirtiest and crappiest jobs around. The dust is so fine and chokes you if you don't have a respirator on. The dust also goes EVERYWHERE and we are still sweeping it up around the house. We are in debt to the following friends who dared to come out and do some destruction with us:
-Peter Sawchyn
-Dominic Rubrecht
-Blair Litzenberger
-Don Balas
-Dan Innes
-Dan Fleishaker
-Chris Beingessner
-Steve Torgerson
-Kendra Walker

The worst sections of pulling off plaster we hit were in the corners of the bay windows and the bathroom walls. In these specially selected spots, somebody had decided to use an industrial diamond shape wire to ensure that the plaster stayed on. HOWEVER, trying to remove said wire piece from wall after it has been on for a 100 years was a bit ridiculous and resulted in many cuts and sore muscles.

The following is a selection of photo's from our destruction of the plaster!

Monday, July 13, 2009

Step #1: Remove Wood Trim

One of the best selling features of this house was that the majority of the wooden trim was NOT painted over! In the Cathedral area, it seems it is harder and harder to find an older house that someone hasn't decided to be lazy and just paint the trim.

So our first job to do,before we could start the demolition, was to remove all of the wooden trim from the two floors. This included door trim, baseboards, and window trim. Markus and I pulled all the nails from the boards as soon as we removed them, labeled them, and then for the doors and windows, we wrapped all the corresponding parts together, so we would know 6 months later which piece went where. I hope this time spent in the beginning will pay off in a few months when we will have to start digging through the ridiculous pile of wooden trim in our basement, find the right parts and begin refinishing them.

Let's Renovate!

Our house by no means was ever "unlivable", although the second floor bathroom left something to be desired with the plywood covering the holes in the water closet and the old cast iron tub with the shower head that could only let out a trickle, the remainder of the house was in good shape considering its age and we were quite happy.

Deciding to undertake a major renovation, like we are doing now, seriously took the last three years of living in this house and chatting with each other about the possibilities. It also took the last three years for us to envision the true potential of this house, experience all the "nuisances", and figure out a game plan. After last summer when we had returned home from our travels and were settling down to start teaching again, we decided that this Spring would be the time to do the renovations. We decided to do them now as we had been very fortunate the last three summers to travel extensively, if we looked into the future we saw ourselves starting a family and neither of us wanted to do renovations with little kids around, and finally we were financially stable enough to embark on such a project.

After we decided that we would actually do this project and could see ourselves pulling it off, we spent the next few months talking about a game plan...How would we start? would we live in the house during the renovation? when would we start? what type of help would we need? who should we call to come in a do our furnace? insulation? wiring? what was our time line? what if we didn't meet our time line? etc, etc.

In the end we decided that as soon as it was warm enough for us to have no heat in the house and the water lines to the boilers wouldn't freeze and break, we could begin!

Official Start Date: April 11th, 2009

The Real Reason

The real reason for this blog is to post about our current renovation of our first and second floor. This is the biggest project either of us has ever considered doing, and has taken us the last 3 years to mull over in our heads and prepare ourselves for the inevitable craziness that will exist for the next few months.

Although we are already in the thick of it, I am going to start at the beginning and hopefully I can catch myself up to regular posts as the project progresses (this whole Blog thing takes way more time than I thought)

Sunday, July 12, 2009

Renovation #2: Conquering the Backyard

As a wedding present in the fall of 2006, my mom and dad helped Markus and I redesign and landscape the backyard. Originally it had a basic patch of grass and a few flowers beds/mounds of dirt around the perimeter of the the yard. We decided that we would tear out the existing sidewalk and replace with paving stones. As well, we would make a small area for grass and redefine the flower beds, eliminating some of the ones that were doing nothing. Finally we built brand new back steps to the back porch.

The following spring in 2007, my dad helped Markus and I design and build an overhang from the garage that would serve to define the patio space. That spring Markus and I planted Hops at each of the posts (thanks to Don Balas' advice), so we would have a vine growing up and over the overhang.

This is what the back yard looks like!

Saturday, July 11, 2009

Renovation #1: Conquering the Third Floor

The first renovation we decided to do was to gut the third floor living space. Initially this area had been a kids room, storage area, and once a rented suit. When we bought it it was divided into three separate rooms (a kids room, 'reading area' and storage area with old counter tops and plumbing for a kitchen). Our first vision for this area was to make a large bathroom, as the second floor bathroom was small and in poor shape. After some hard thinking and a wonderful design by my father Peter, the official vision for the third floor was developed. The final plans had 3/4 of the space as a family room and the remaining 1/4 as a large bathroom.

We began demolition early in January as our initial wish was to have it done by our wedding day in July. However, as most renovations go, we were still doing work that July as our wedding day approached. Even though we did not get it done for the wedding, the amount of time we took to do it paid off as it turned out wonderful and we now use it constantly.

Some of the improvements we made were:
1) shoveled out 60 "industrial" sized
garbage bags of sawdust that once acted as some type of insulation and replaced all walls, knee wall, and ceiling with proper insulation
2) Removed 1/4 inch plywood that wa
s acting as wall covering and replaced with proper drywall
3) Added a commercial toilet tha
t cost close to $800 due to the slope needed to drain toilet to stack, However, NOTHING gets stuck in the toilet now!
4) Added a double sink vanity, extra
deep tub, and built ourselves a large walk in shower consisting of a bench and double shower heads.

Here is what the finished third floor looks like, I can't seem to find our "before" pictures right now so I will post them when I do!